Sunday 22 May 2011

Few site updates...

This blog gets updated fairly regularly. I try to make a point of updating it with fresh content all the time as its one of the things I don't like to much about a lot of other photographers web sites/blogs.

Anyway My website itself gets a bit ignored, but not for much longer, with a bit of a redesign on the horizon making it easier for me to edit it all I will be keeping on top of it much better...

But in the last week or so there has been a few little updates worth mentioning, mainly in the social networking department...


So first off we have added a FB like bar at the bottom so you can quickly and easily share it if you like it, there are also all the icons in the bottom right corner to flickr,FB,Twitter,Vimeo and youtube...so go find me and add me on there to keep up to date on all of those.


I then gave the video page a bit of an update with some more recent work for a few different people, and made all the videos hosted on vimeo to neaten it all up a bit...


Theres also some fresh new work in the "Wedding" gallery on my site, so if you haven't already go check that out.

Anyway, more real posts soon.

Ta

J

Saturday 21 May 2011

3 Bits of advice...

There are lot of things I get asked on a pretty regular basis, and one that keeps popping up is what advice would you give to an aspiring photographer who's looking to try and make some money doing this...

There are all the normal bits of advice that go with most kinds of business, be polite, work hard, do the very best you can etc... they all go with out saying, its just common sense.


I think the 3 things that have got me to where I am now are these though...

  • Shoot as often as you can
Get out and take photos as much as you can, try all the buttons, try things out, learn by making mistakes. So many people are scared of failing, but without failing when it doesn't matter and theres nothing riding on it is how you learn, and quite often how you stumble across things that look really good. Work out what your doing wrong and don't do that thing again, if something works out well, work out why so you can do it again.
  • Shoot what you want, how you want
Shoot what you have a passion for. If you really have a passion for something and understand it that will show in the photos. Second shoot it how YOU want, not how someone else is doing it. Yes copy people you admire, but not exactly always add your twist. If your work looks exactly like someone Else's work, why should people look at yours?


  • Look at other peoples work
Look at other photographers work and work out how they did it, how you can do something like it. work out what you like, what you don't like. Don't just stick to photographers shooting the same stuff as you, I look at a lot of Ad and fashion photographers work, I also look at a lot of videos, graphic design, listen to a LOT of music and generally surround myself with creative work of all types.


I will be doing another blog post soon on the photographers that inspire me, and some of my aspirations and how I went from shooting photos on my dads compact to making money doing what I love...

Ta

J

Monday 16 May 2011

Few photos of my local woods

Few photos of my local woods "Tavi Woodlands"...

O and its me riding as well ha

First shots of me riding a MTB from the last year pretty much...

All Taken by my mate Joe S H, Edited by yours truly...


More real blog posts and fresh work in the next few days...

Wednesday 11 May 2011

Few new tear sheets/Ads...

Over the past month I have had a fair bit of work crop up in various magazines...

I am now the SW corespondent for Dirt, had some work in there, Did some work for MBUK at the first round of the BDS, and a shoot I did for MBR is in the current issue...

So just a quick look at some of that, and also at a few Ads that are new this month as well and a look at the shots pre Ad.

Shot from a shoot for Genesis bikes up in Afan a month or so ago went out in an Ad this month...

The shot I shot above, and it in the Ad bellow...


And this is another shot from the same shoot that ran on the 2011 trade catalogue for Madison...


And now some Tear sheets from this months mags...


Saturday 7 May 2011

New Banshee Rune

If you know me personally you will know that for the last 10 months I have been with out a big bike. Its been horrible.

It died like many other bikes out in Morzine last summer, and with one thing and another its taken until now to get another one out on the tracks.

The bike in question is a 2011 Banshee Rune in team red, and I for one think its stunning.

I have always had DH bike, ridden mainly DH, but also ride a fair bit of XC...so wanted a bike that could do everything, but was better at going down hills than up them, and this bike ticked all the boxes.

Keith Scott and Banshee helped out a lot, as did the guys Lifer bmx, Dartmoor cycles, Madison and Silverfish, So thanks to all you guys for helping me put together such a sweet bike.

Anyway some photos of it:


Full build specs are:

Frame: 2011 Med Banshee Rune Team red
Fork: Fox Talas 36
Shock: Fox DHX 5 air
Wheels: Mavics
Brakes: Avid
Gears: Sram x9
Cranks: Truvativ Stylo
Pedals: Straitline
Bars/Stem: Raceface Atlas

Thursday 5 May 2011

Using flash and typical lighting set ups...

One of the questions I seem to get asked a lot is how I use flashes. Typical placements, and powers and how to go about setting them up and using them properly.

Its like most things in life and photography, its practice. I use flashes on 80% of shoots I do, and that's pretty often, so for me anyways its almost instinct. I can rock up to a spot, take a look at the ambient light and guess what the flashes need to be pretty spot on first go.

So when I want to set up and strobed shot I do this:

  • Take a second to look around, work out where the sun is, what kind of terrain there is to work with
  • work out what lens to use, long, wide etc etc
  • work out what angle you want to shoot from
  • work out if you want a nicely balanced shot, so flash and ambient work together well, or if you want something more flash heavy.
  • Then get the flashes out of the bag.
  • Work out where you want light to fall on the rider/trail...put them where they need to be to do that.
  • Then work out zoom and power settings
  • then start shooting...

Something that not to many people seem to realise is that shutter speed only really affects ambient light , and not flash, and flash light is controlled in camera by the aperture.

So if you set up the flashes and they are a bit hot, go for a slightly higher Fstop, and in turn lower the shutter a bit. Or just go and turn the flash down... ha

Anyway now I will show you a few of my fav shots I have used flash on and tell you where and roughly the flash set ups for each shot.

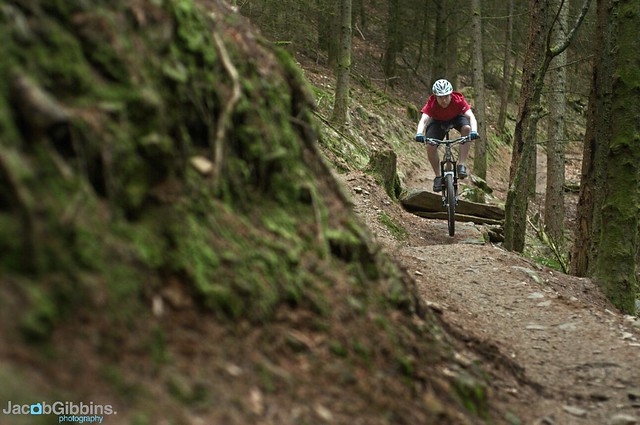
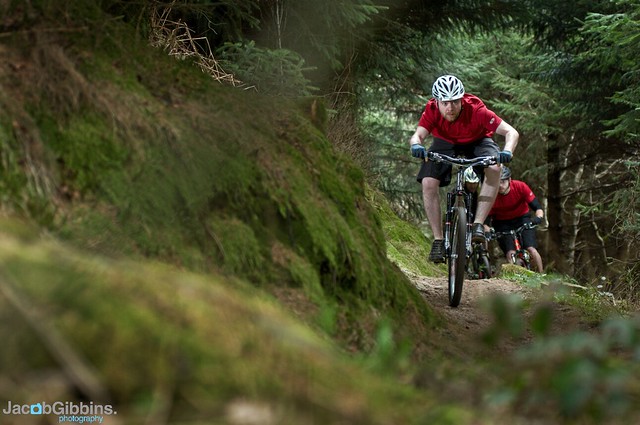
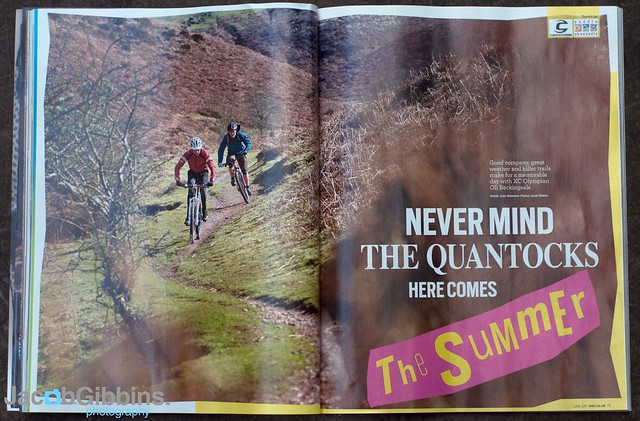
A pretty balanced shot as far as lighting's concerned...one flash behind the tree in the center of the shot on about 1/16th power and pretty wide zoom. one flash just out of shot to the bottom left of the shot on about 1/4 and about 50mm zoom...

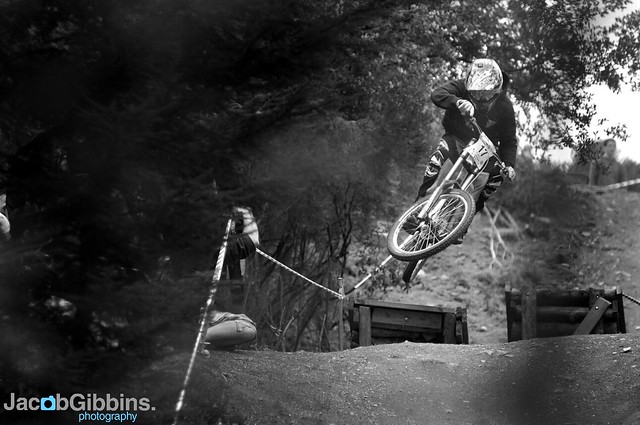
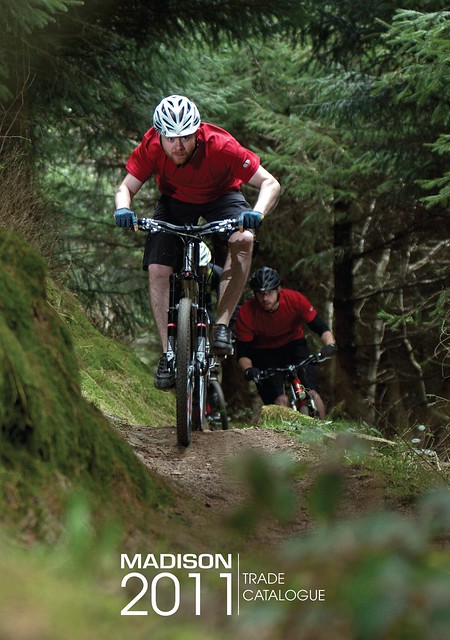
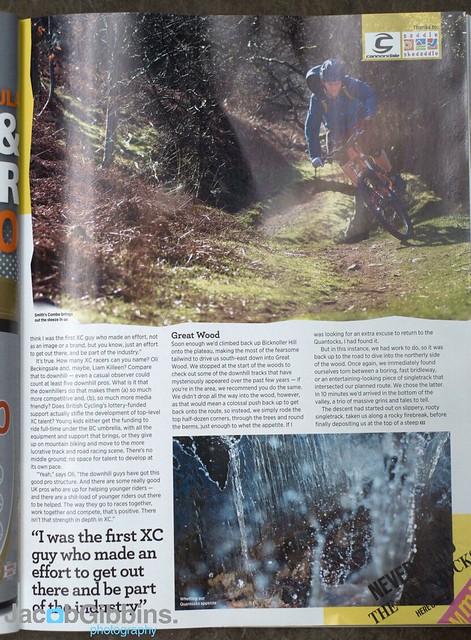
A more flash heavy image here. Flash behind the tree on the left of the image will have been wide and about 1/8th power. then flash just out of shot on the right on the same side of the track as me on about 1/8th and again wide.
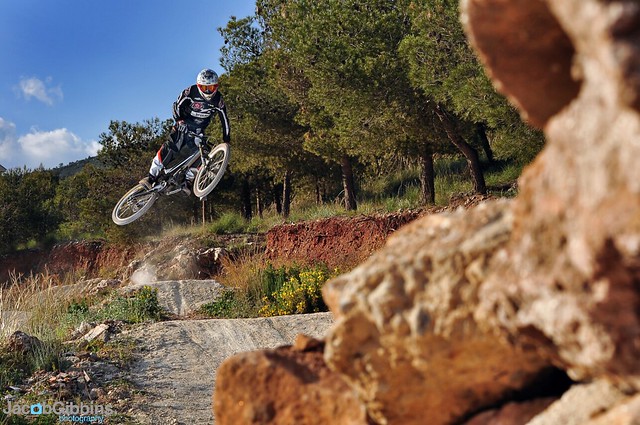
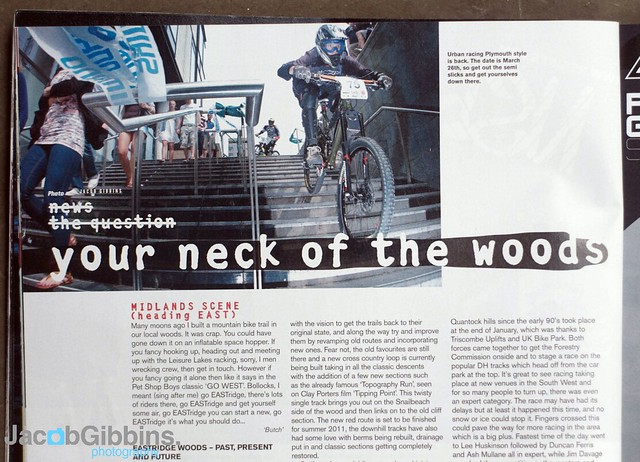
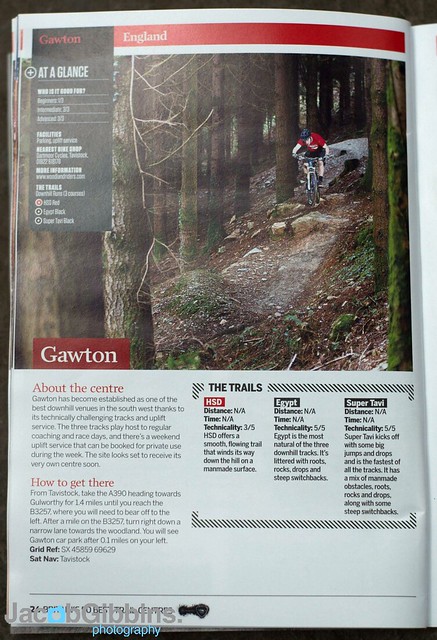
This is a good example of using the sun as a natural rim light. Only one flash used just to the left of the camera, very zoomed in around 80-100mm and on about 1/4 power as I was about 20 feet from the rider.
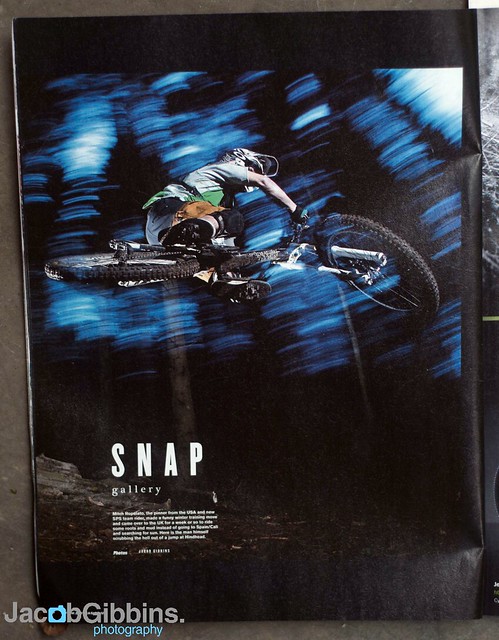
Flash just out of shot to the right of camera , wide and about 1/16th power. Flash just out of shot to the left is about 6 foot lower down the landing, zoomed in to about 50mm and about 1/8th power. Sun as natural rim light.

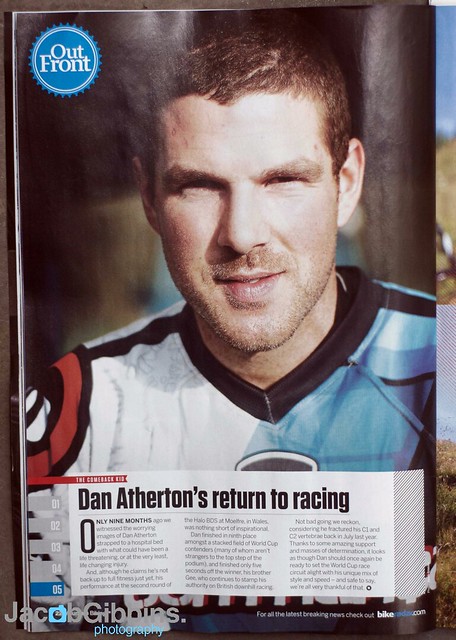
Again a pretty balanced shot ( I tend to shoot this way ) Flash out of shot on the right is pretty zoomed in and on 1/16th power. Flash out of shot in the left is wider probs about 24mm and about 1/8th.

So the typical lighting set ups are normally 2 flashes. I have 3 but don't really use the 3rd as 2 well placed lights is normally enough and takes a 3rd of the time to set up.

You often see flashes in a diagonal line crossing the rider. One as Rim and one as main fill...That's a tried and tested set up that just works. But for more interesting shots, you need to think a bit more outside the box...

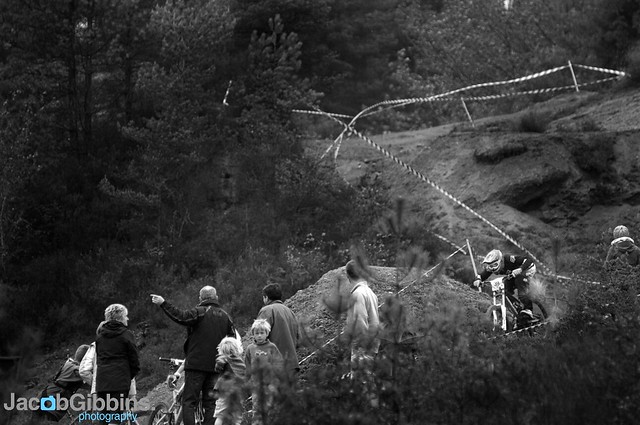
Try and guess the lighting set up for these ones, if any one guesses them I will send you a free print...